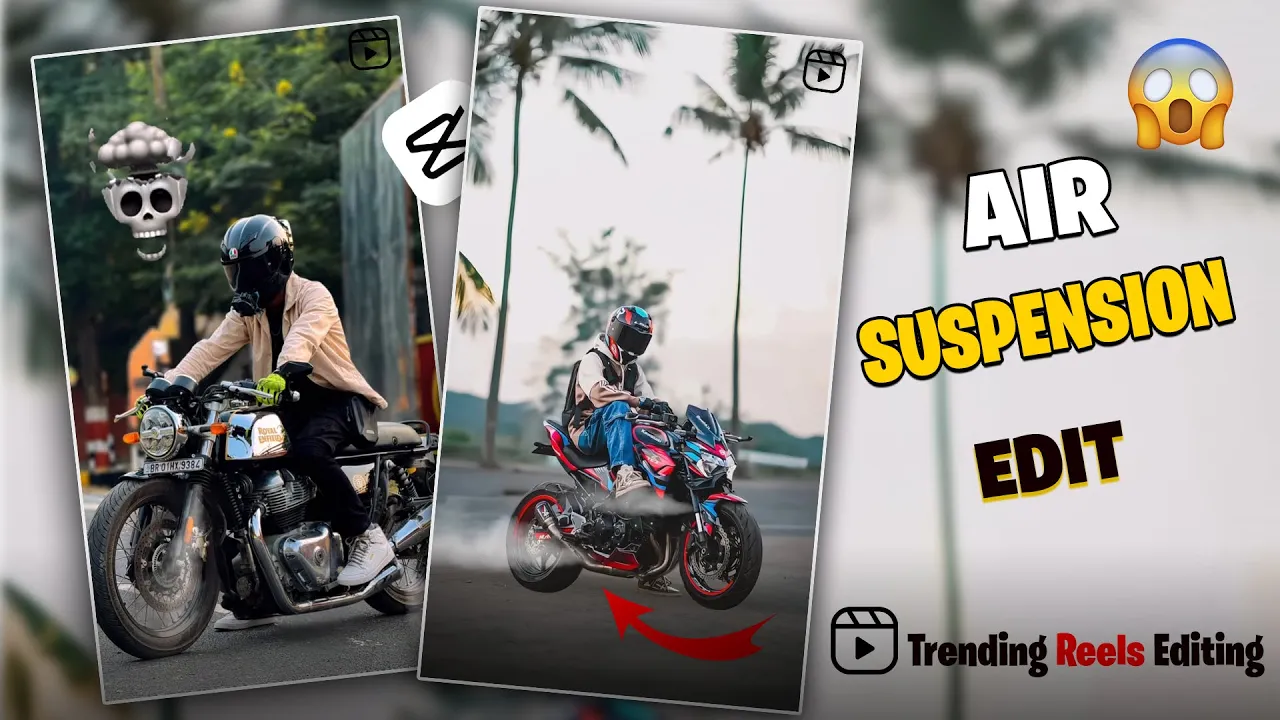
Create Professional Bike Edit Videos Using PhotoRoom and CapCut
Are you interested in making amazing bike edit videos directly from your smartphone? If yes, then follow this step-by-step guide till the end. With the help of PhotoRoom and CapCut, you can easily create professional-quality edits in just a few minutes.
Step 1: Open the PhotoRoom App
First, download and open the PhotoRoom app. Once you open it, you will see a clean interface with different editing tools. Scroll down and click on the AI Tools option. From here, select the Retouch feature.
Step 2: Import and Edit Your Picture
Now, import your picture into the app. Erase the unwanted part of the image from the top portion and click Done. After that, export your edited photo.
Step 3: Remove Background
Go back and choose the Remove Background option. Import your picture again, and PhotoRoom will automatically erase the background. For better results, use the Cut Out option to erase unnecessary parts like the bike tires. Export this transparent background image.
Step 4: Open CapCut and Create a New Project
Before opening CapCut, make sure you connect to a VPN. Now open CapCut and click on New Project. Import the first edited photo (with erased parts) and adjust its length to about 8–9 seconds. Set the aspect ratio to 9:16 and zoom in slightly with two fingers.
Step 5: Add Overlay
Click on Add Overlay and import the second edited picture. Zoom in and adjust the length the same as the first one. Then, add a keyframe and move the overlay slightly downward at the 4-second mark to create a smooth animation effect.
Step 6: Add Smoke PNG and Effects
Now, add a smoke PNG overlay. You can find free PNGs on sites like CleanPNG. After importing it, apply the Chroma Key feature and select green color to remove the background. Use HSL Adjustments to desaturate the green completely. Place the smoke effect near the bike suspension and adjust opacity around 40–50%.
Step 7: Apply Video Effects
Next, apply effects like Shake and Black Flash. Extend the effects across the whole clip and reduce their intensity for a professional look. Duplicate overlays and place them accordingly to match the suspension movement.
Step 8: Add Music
Finally, add background music to your video. You can find royalty-free tracks on Pixabay Music or Uppbeat. Extract the audio, delete unnecessary clips, and export your final video.
Conclusion
That’s it! Your professional bike edit video is ready. This tutorial showed you how to use PhotoRoom for background removal and CapCut for overlays, effects, and music. If you still find any step confusing, feel free to message for guidance, and you’ll be walked through the process step by step.
For more editing resources, check out:
- Adobe Express – Free online editing tools
- Remove.bg – AI-powered background remover
- Mixkit – Free stock music for videos